Procedure: Configure Agentless User-ID
Overview
To configure Agentless User-ID, first create the necessary service account in Active Directory (AD), then modify and verify required security settings on the AD server and the Palo Alto Networks device.
Steps
-
Create Service Account in Active Directory (AD)
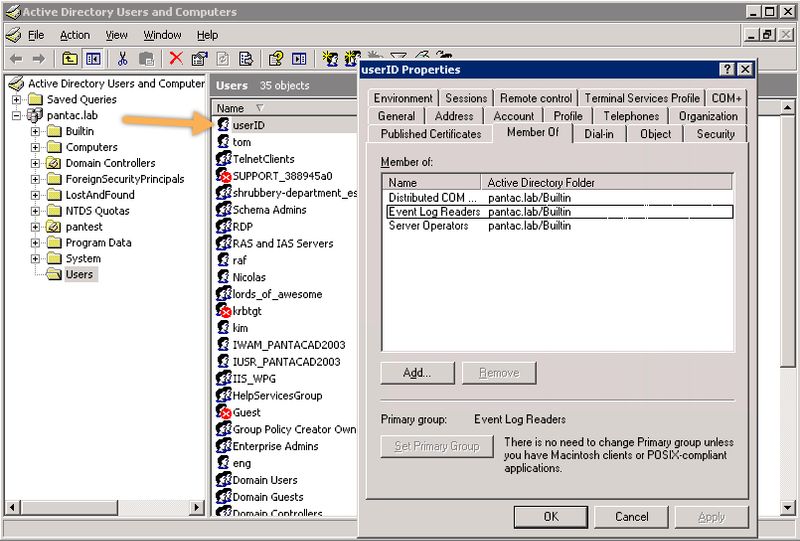
Create the service account in AD that the Palo Alto Networks device will use. Ensure this user account is a member of the following AD groups:
- Distributed COM Users
- Event Log Readers
- Server Operators
Note: Domain Admin privileges are not required for the User-ID service account to function properly. Refer to Best Practices for Securing User-ID Deployments for more information.
In Windows Server 2003 environments, the service account must be explicitly given the “ Audit and manage security log ” user right through a group policy, as the "Event Log Readers" group does not exist. Making the account a member of Domain Admins grants all necessary rights but is generally not recommended for security best practices.
-
Configure WMI Security Settings (CIMV2)
The device uses WMI Authentication . You must modify the CIMV2 security properties on the AD server(s) that the Palo Alto Networks device will connect to for monitoring.
-
Open WMI Management Console
Run
wmimgmt.mscfrom the command prompt or Run dialog on the AD server to open the WMI Management console.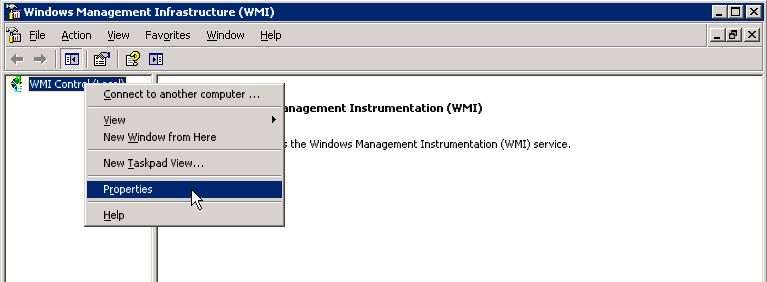
-
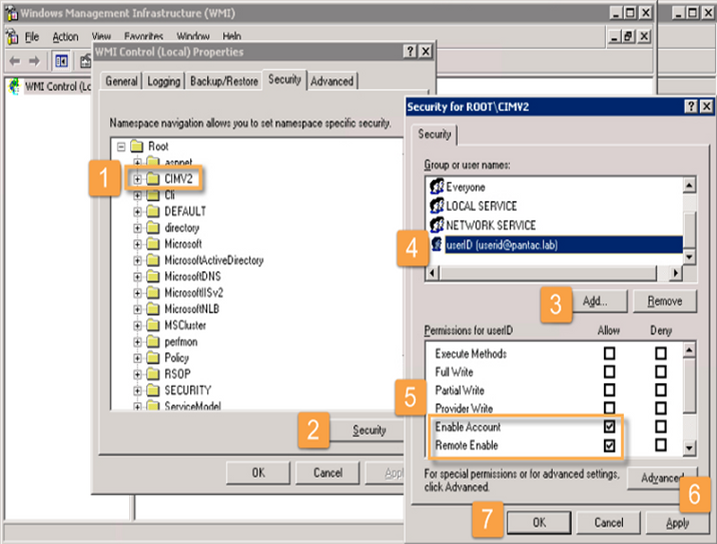
Modify CIMV2 Security Properties
From the WMI Control Properties window (right-click "WMI Control (Local)" and select "Properties"):
- Navigate to the Security tab.
- Expand "Root" and select the CIMV2 folder.
- Click the Security button below the namespace list.
-
Click
Add
and select the service account created in Step 1 (e.g.,
pantac\userid). -
With the service account selected, ensure the following permissions have
Allow
checked:
- Enable Account
- Remote Enable
- Click Apply .
- Click OK on the Security for ROOT\CIMV2 window, and then OK on the WMI Control Properties window.
-
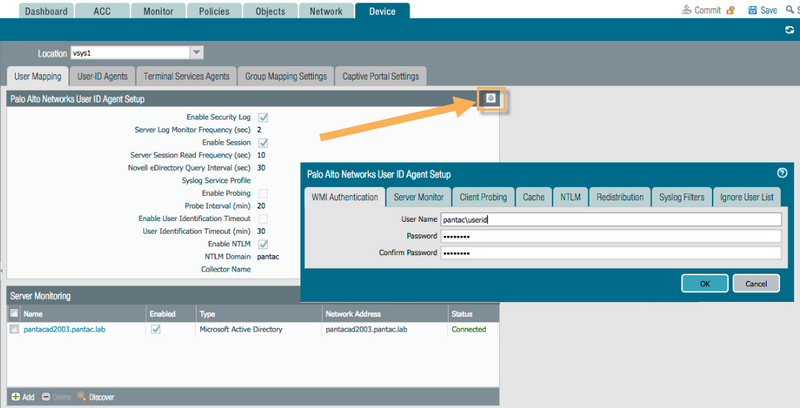
Configure User Mapping on Palo Alto Networks Device
Log in to the Palo Alto Networks device WebGUI:
- Select Device > User Identification > User Mapping .
- Click the gear icon (settings) in the upper right corner of the "Palo Alto Networks User-ID Agent Setup" section.
-
Configure WMI Authentication Details
Within the User-ID Agent Setup window:
- Go to the WMI Authentication tab.
-
Enter the service account username in
DOMAIN\usernameformat (e.g.,pantac\userid). - Enter and confirm the password for the service account.
-
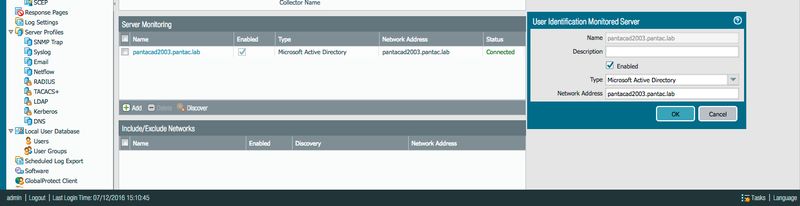
Configure Server Monitoring
Within the User-ID Agent Setup window:
- Go to the Server Monitor tab.
- Ensure Enable is checked.
- Select appropriate options for monitoring Security Logs and/or Session information based on your environment's needs.
- Client Probing (under the main User Mapping tab) is often enabled by default. Disable it if it's not required or desired in your environment.
-
Specify Monitored Servers
Still within the Server Monitor tab:
- If the domain was configured during device setup (General Settings), you might use server auto-discovery.
- Otherwise, manually Add each AD server (Domain Controller) you want the firewall to monitor under the "Directory Servers" section. Enter its Name/IP address.
-
Verify Server Monitor Connectivity
Confirm the firewall can successfully connect to the configured AD servers using the specified service account and WMI.
- You can check the status in the WebGUI under Device > User Identification > Server Monitoring tab. Look for a "Connected" status.
- Alternatively, use the CLI command:
> show user server-monitor statistics

Directory Servers:
Name                         TYPE      Host                         Vsys      Status
-----------------------------------------------------------------------------
pantacad2003.pantac.lab      AD        pantacad2003.pantac.lab      vsys1     Connected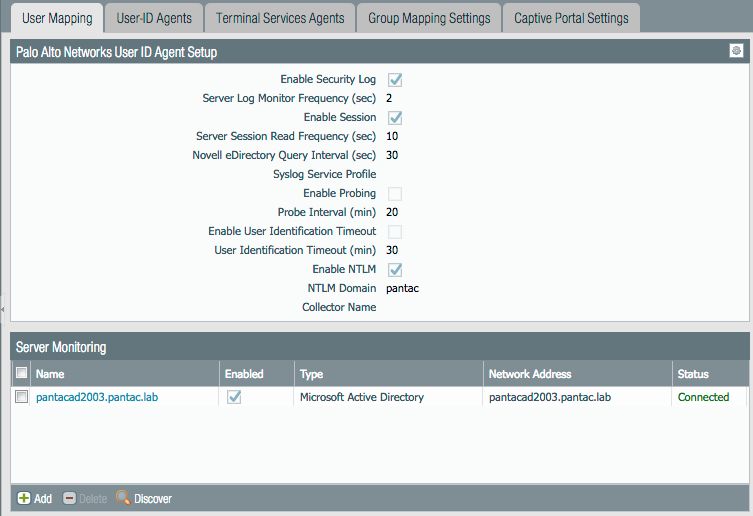
-
Verify IP-User Mapping
Confirm that the firewall is learning IP-to-user mappings from the monitored servers via the security event logs.
Use the CLI command:
> show user ip-user-mapping all IP Vsys From User IdleTimeout(s) MaxTimeout(s) --------------- ------- ------- ------------------------------- -------------- ------------- 192.168.28.15 vsys1 AD pantac\tom 2576 2541 192.168.29.106 vsys1 AD pantac\userid 2660 2624 192.168.29.110 vsys1 AD pantac\userid 2675 2638 Total: 3 users -
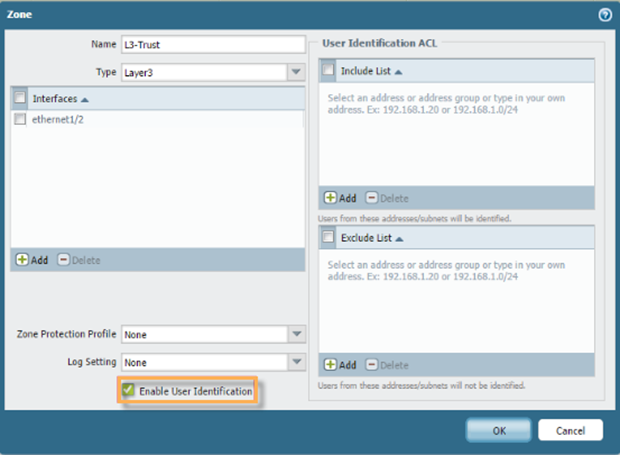
Enable User Identification on Zones
Ensure that User Identification is enabled on the network zones where the user traffic (whose identity you need to map) will originate.
- Navigate to Network > Zones .
- Select a zone (e.g., your internal user network zone).
- Check the box for Enable User Identification .
- Repeat for all necessary zones.