Understanding NAT in Palo Alto Networks Firewalls
Most of the time, you'll be working with two types of NAT - Source NAT and Destination NAT. Source NAT is when you change the source IP address of your traffic (usually a private IP) to a public IP that is routable on the Internet. For example, if you have hundreds of people in your office, they are assigned private IPs. When their traffic goes out to the Internet, the Palo Alto firewall translates their private IP (source) to a public IP and the destination IP remains unchanged.
With Destination NAT , the process works the other way around. If you host publicly available resources in your network, like a web server, and someone on the Internet wants to access it, they will target a public IP address that is configured on the firewall. The firewall receives this request and then changes the destination IP to the server's real private IP and the source IP remains unchanged.
We'll also cover Bi-Directional NAT and U-Turn NAT . So, let's get started.
💡
Throughout this post, I'm going to mask my public IP in the screenshots. So, if you see an IP address masked, that's my public IP. I just prefer not to expose it. I will use x.x.x.x as the public IP in the diagrams.
Source NAT
With Source NAT, we translate the source IP address of traffic to the public IP address of the firewall as it leaves the network. When return traffic arrives at the firewall, it uses a state table to track all translations, changes the IP back to its original, and forwards it to the device.
In Palo Alto, there are three types of Source NAT , but the most commonly used one is Dynamic IP and Port . This method allows multiple hosts to have their source IP addresses translated to the same public IP but with different source port numbers. For example, if you have 100 users in your network, all their IPs will be translated to a single public IP with different port numbers. This is what most of us use in typical scenarios.
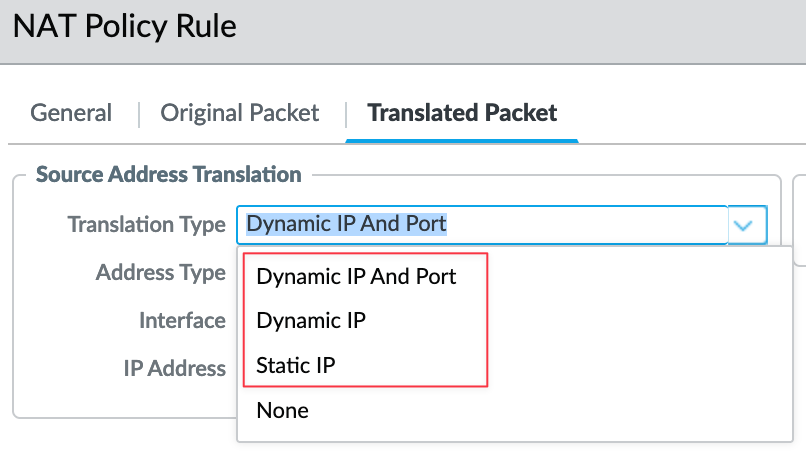
The second type is Static IP , which allows for a 1-to-1 static translation of a source IP address while leaving the source port unchanged.
The third type is Dynamic IP , which allows a one-to-one dynamic translation of a source IP address (without modifying the port number) to the next available address in the NAT address pool. The size of the NAT pool must match the number of internal hosts that need address translations. By default, if the number of internal hosts exceeds the size of the NAT address pool and all NAT addresses are allocated, new connections requiring address translation will be dropped. This is very uncommon and can be useful in specific scenarios.
Source NAT Example with Dynamic IP and Port

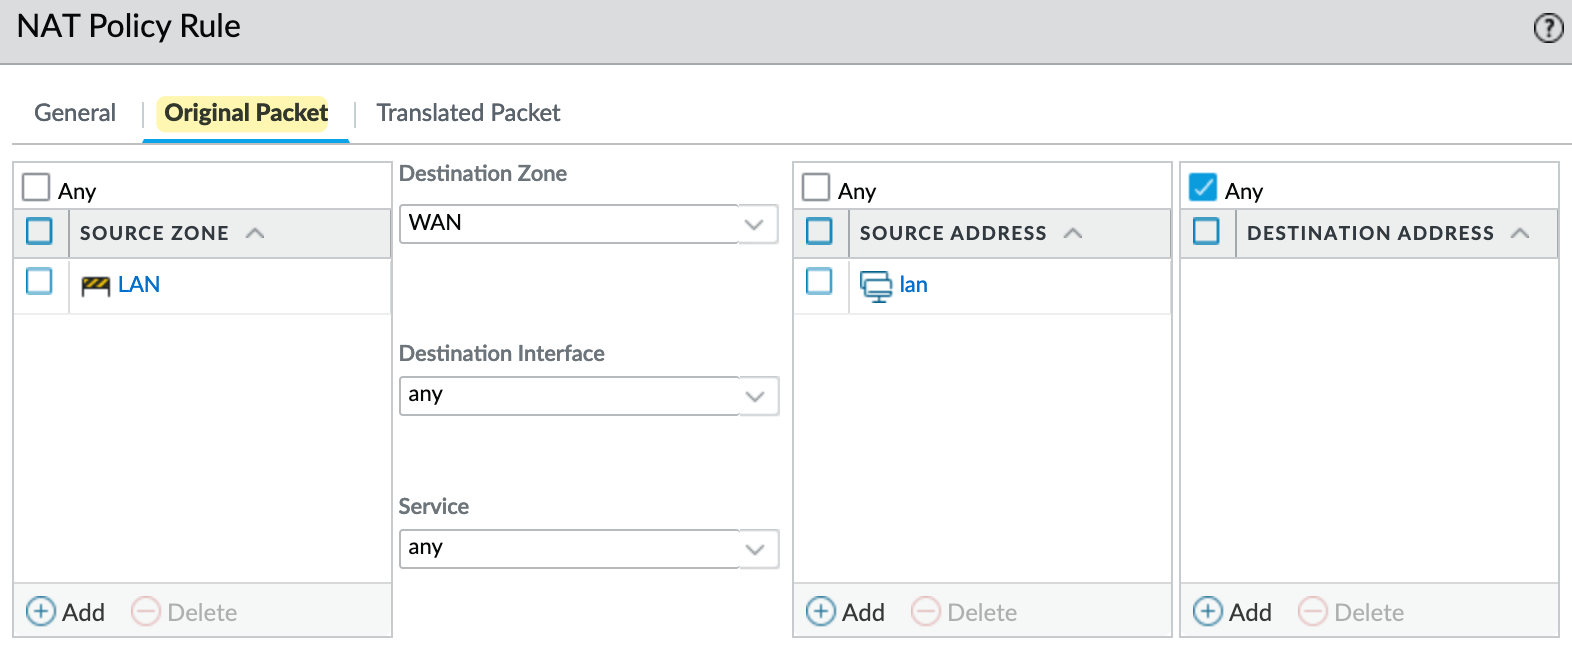
In this example (using the first method Dynamic IP and Port ), I have a zone for end users called ' LAN ', and my Internet connection is on interface ethernet1/8 in the ' WAN ' zone. I'm creating a Source NAT policy that tells
-
if the original traffic is coming from the LAN zone and
-
is destined for the WAN zone
-
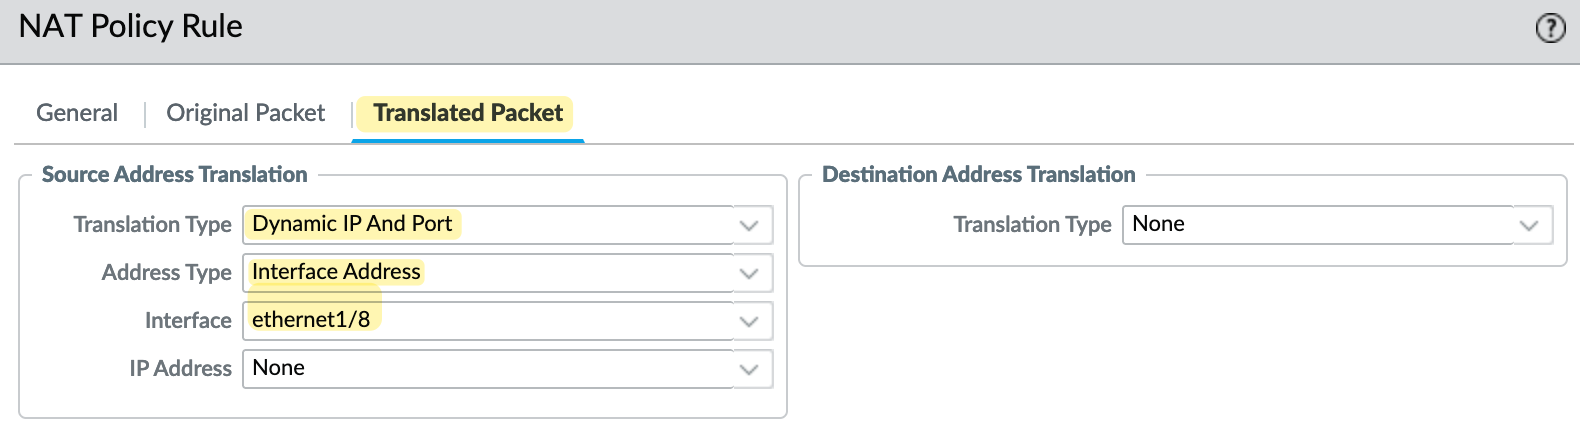
the translated packet should use the ' Dynamic IP and Port ' type and change the source IP to the IP address of the firewall's ethernet1/8 interface. I have a public IP configured here. If you have a subnet, like a /28, you can choose a different IP from that pool instead of using the actual interface's IP.

💡
In the screenshot, you'll notice that the IP address is displayed as ' None '. This is because my public IP is assigned dynamically via DHCP by my ISP. In most cases, you'll be using a static IP, and the configured IP should show up in this section instead.
If you have multiple source subnets or zones, you can still use a single NAT policy by adding these additional zones to the Original Packet section. You can also set the source IP to ' any ', which means if you add more subnets to the same zone in the future, you won't need to keep updating the NAT policy with each new subnet.
Destination NAT
Destination NAT, as the name suggests, translates the destination IP of the packet. A common scenario for this is when you host a public website and want people on the Internet to access it. Typically, you'll place your server in a DMZ environment with a private IP address. You will then provide a public IP address for people on the Internet to target, which is configured on the firewall. When traffic arrives at the firewall, it changes the destination IP to the server's real private IP and forwards the traffic to the server.
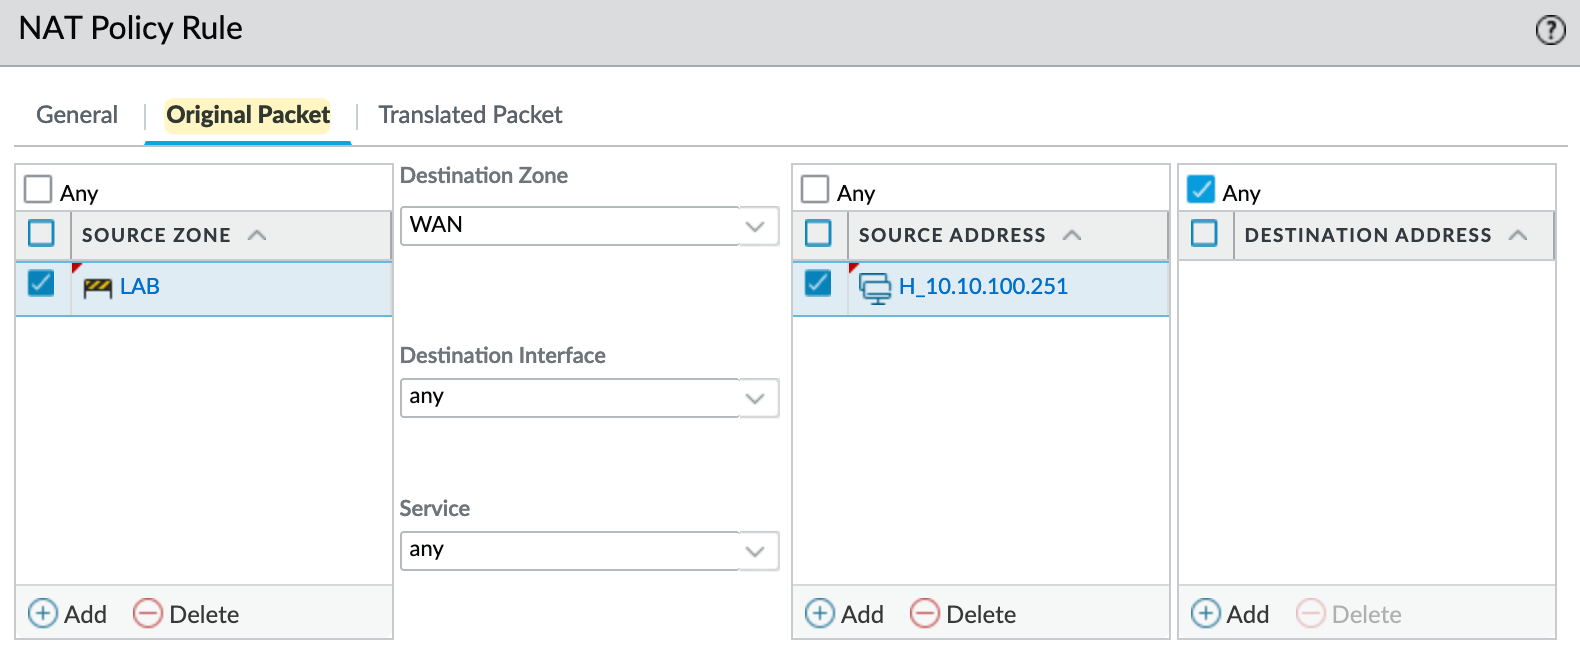
In this example, I have another zone called ' LAB ', which you can think of as a DMZ. In this zone, I have a web server with an IP address of 10.10.100.251. I want to expose this server to the Internet.

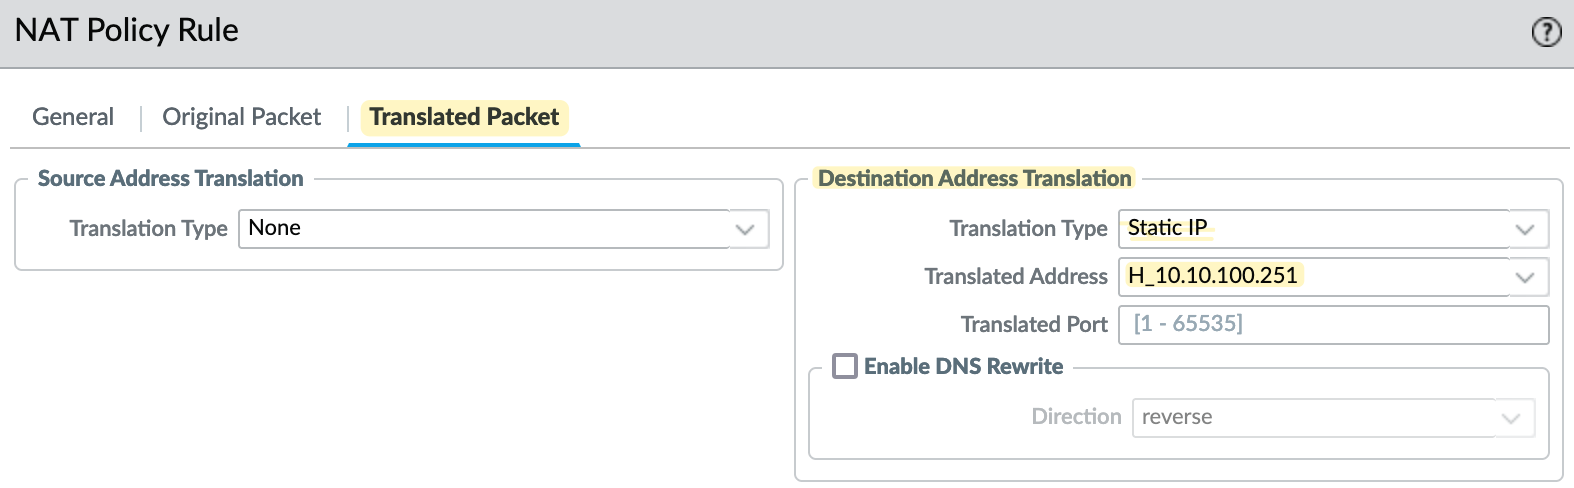
In my Destination NAT policy, I specify that
-
if traffic is coming from any IP (since we don’t know the source IP of users, as there could be millions) and
-
is destined for the firewall's IP address (shown as x.x.x.x), then the destination IP should be translated to 10.10.100.251.
💡
Note that if you have a pool of IPs from your ISP, you can use any IP from that pool, it doesn't have to be the exact IP configured on the firewall interface.
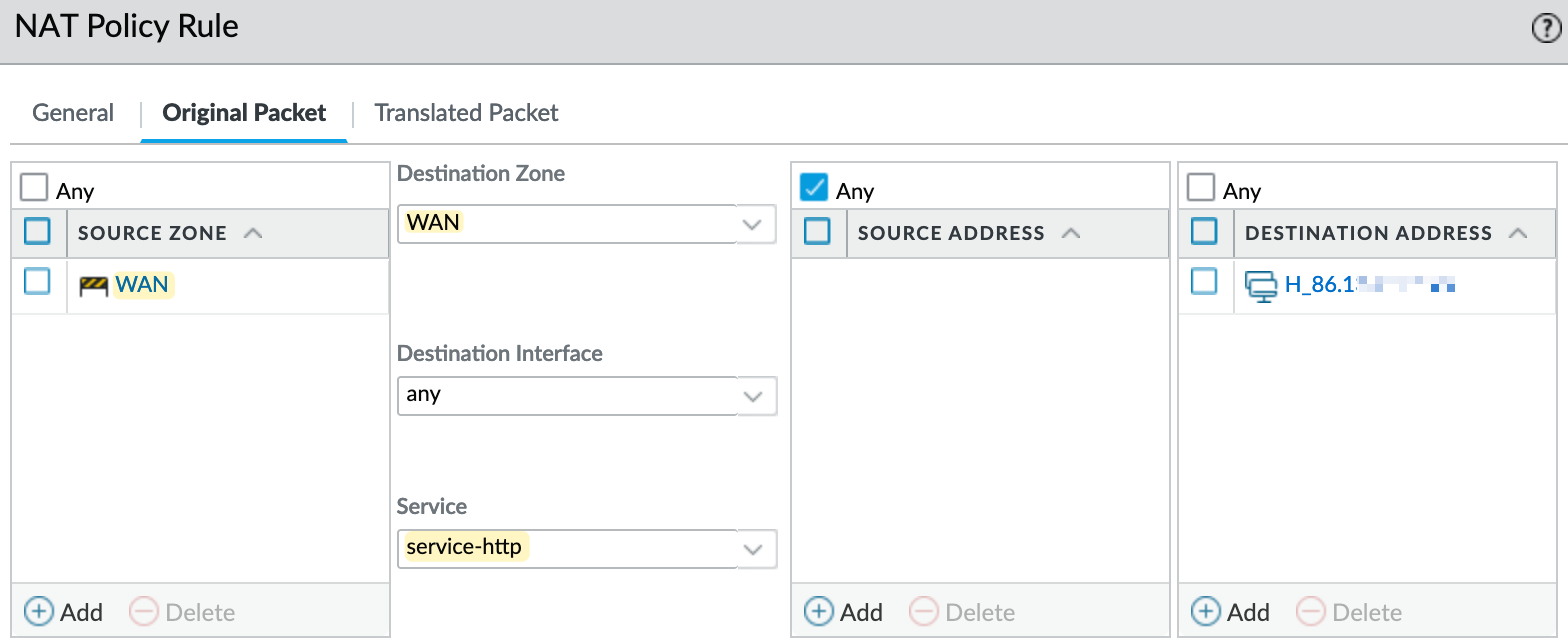

In the NAT policy, it's important to note the source and destination zones. Here, the traffic comes from the ' WAN ' zone, and the destination IP is also in the ' WAN ' zone. Therefore, you need to set 'WAN' as both the source and destination zone. I'm also specifying the service as ' http ', meaning the NAT policy will only be triggered for traffic targeting port 80. If someone tries to access this IP via SSH, for example, the NAT policy won't apply. If you want to forward all ports, you can leave the service set to ' any '.
Additionally, you need to create a security policy to allow this traffic. This is where some confusion might occur. On the security policy, the source zone remains 'WAN', but the destination zone should be set to the actual zone where the server resides , which is ' LAB ' in this case. The destination IP should also be the pre-NAT IP , not the real internal IP. Keep this in mind to avoid configuration issues.

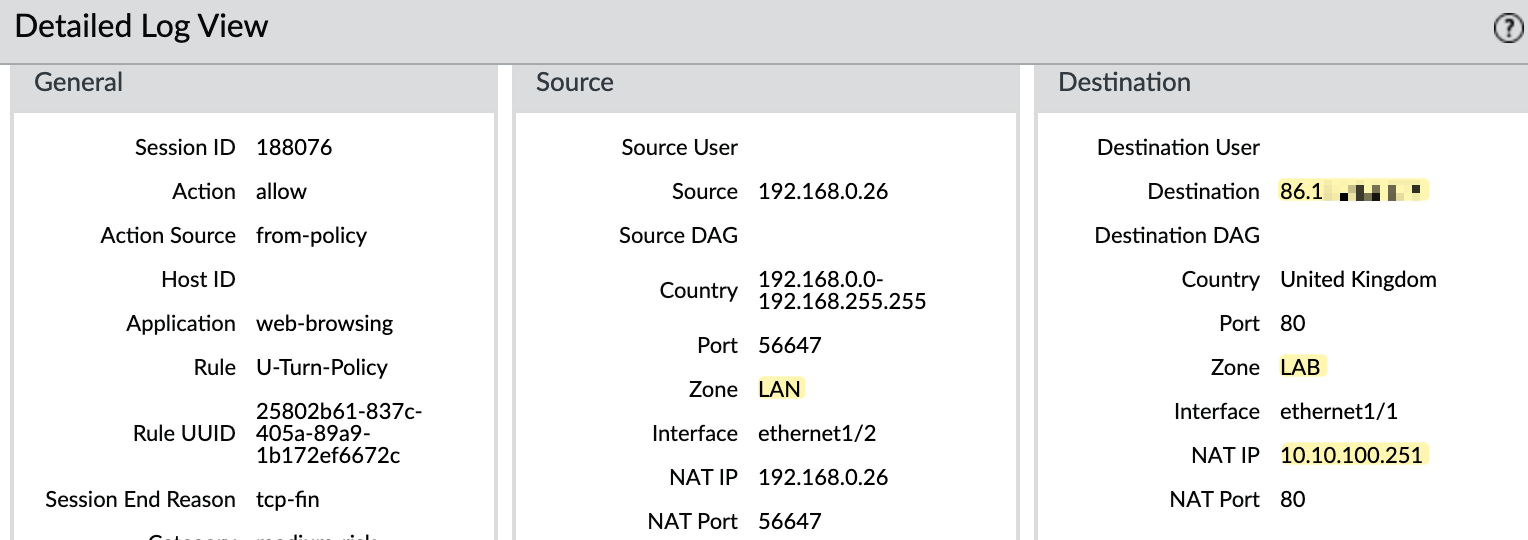
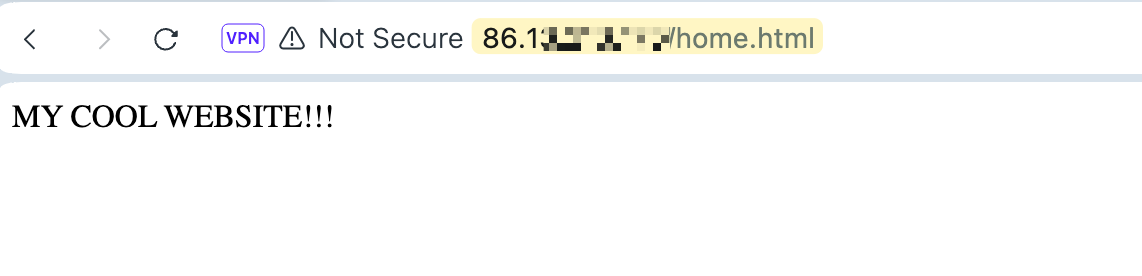
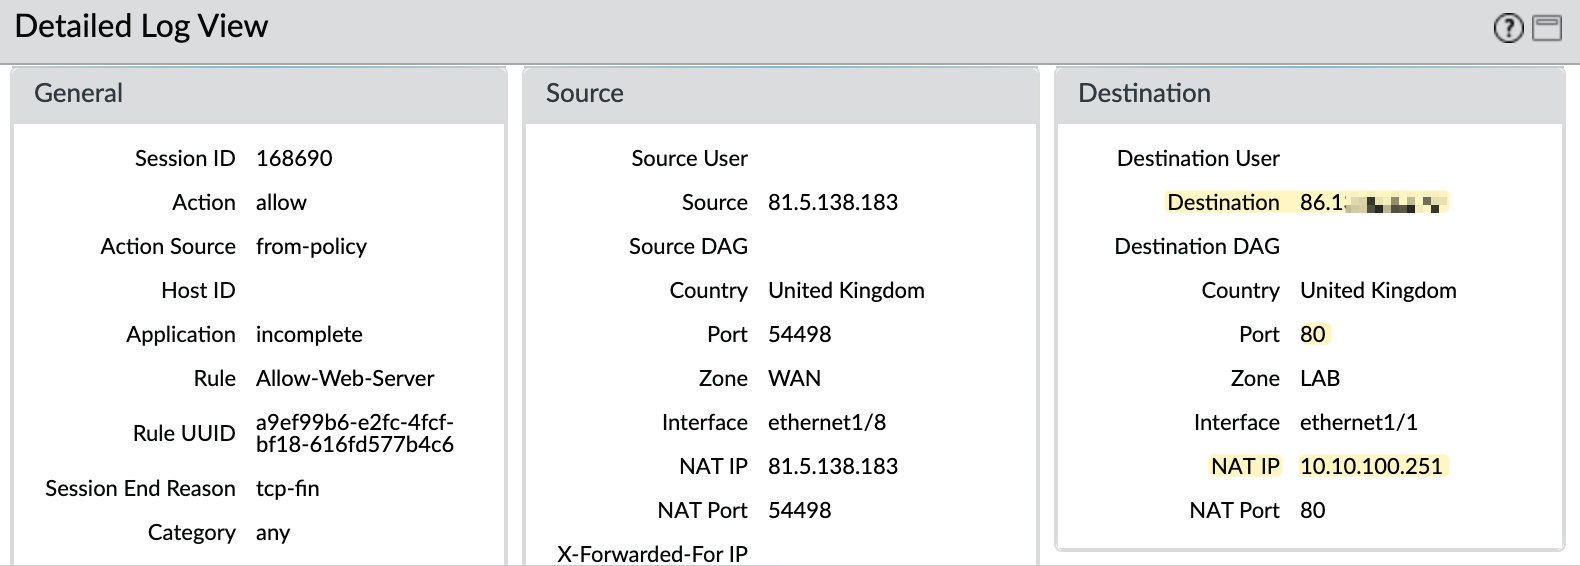
I'm on the Internet and trying to access the public IP and can successfully reach the webserver. In my traffic logs, you can see that the NAT is working as expected.
Bi-Directional NAT
Bi-Directional NAT is like combining Source NAT and Destination NAT into a single configuration. Using our previous Destination NAT example, remember that the NAT will only work if someone initiates traffic from the Internet towards your server. If the server itself wants to initiate traffic, such as performing DNS lookups or accessing updates, you'll still need a Source NAT rule to translate the server's source IP. In most cases, this would be handled by an existing Source NAT, but not always.
With Bi-Directional NAT, you create a Source NAT of type 'Static IP' and then tick the box for Bi-Directional. The firewall will then automatically create the corresponding Destination NAT rule for you. Personally, I don't use this feature because the Destination NAT rule that the firewall creates in the background doesn’t show up under policies, which could confuse someone else reviewing the configuration.
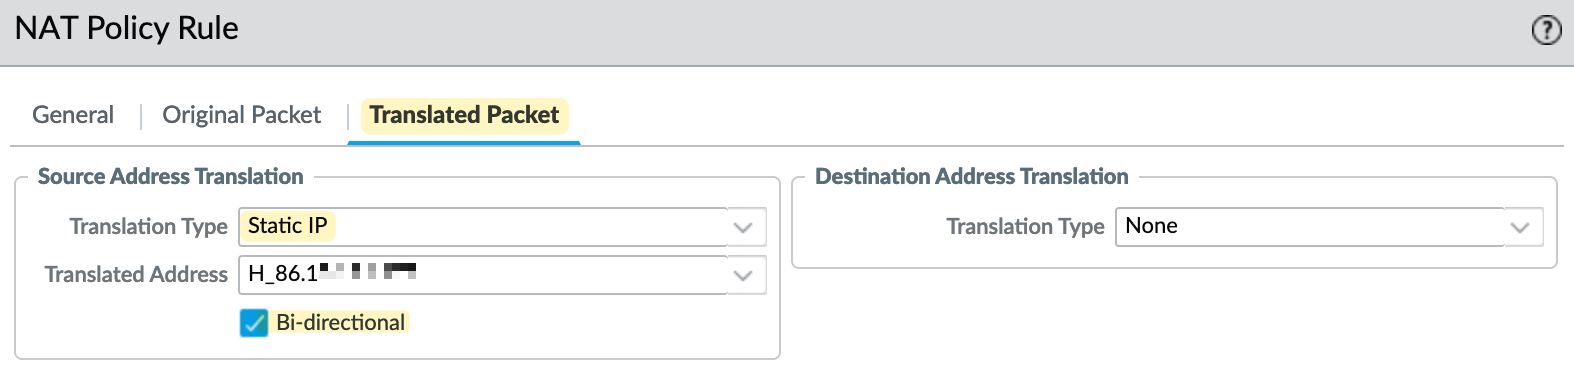
So, in this example, if the server initiates traffic to the Internet, its source IP will be translated to the firewall's public IP address using Source NAT. On the other hand, if someone initiates traffic to the firewall's public IP on port 80, it will trigger the Destination NAT and translate the destination IP to 10.10.100.252
U-Turn NAT
U-Turn NAT is used when internal users need to access an internal server using the server’s external public IP address.
Using our previous example, let's say users in the ' LAN ' zone want to access the web server in the ' LAB ' zone, but the DNS server resolves the request to the server's public IP. This may work even without a NAT policy in some cases, but adding a NAT policy ensures the traffic gets diverted to the server's real internal IP.
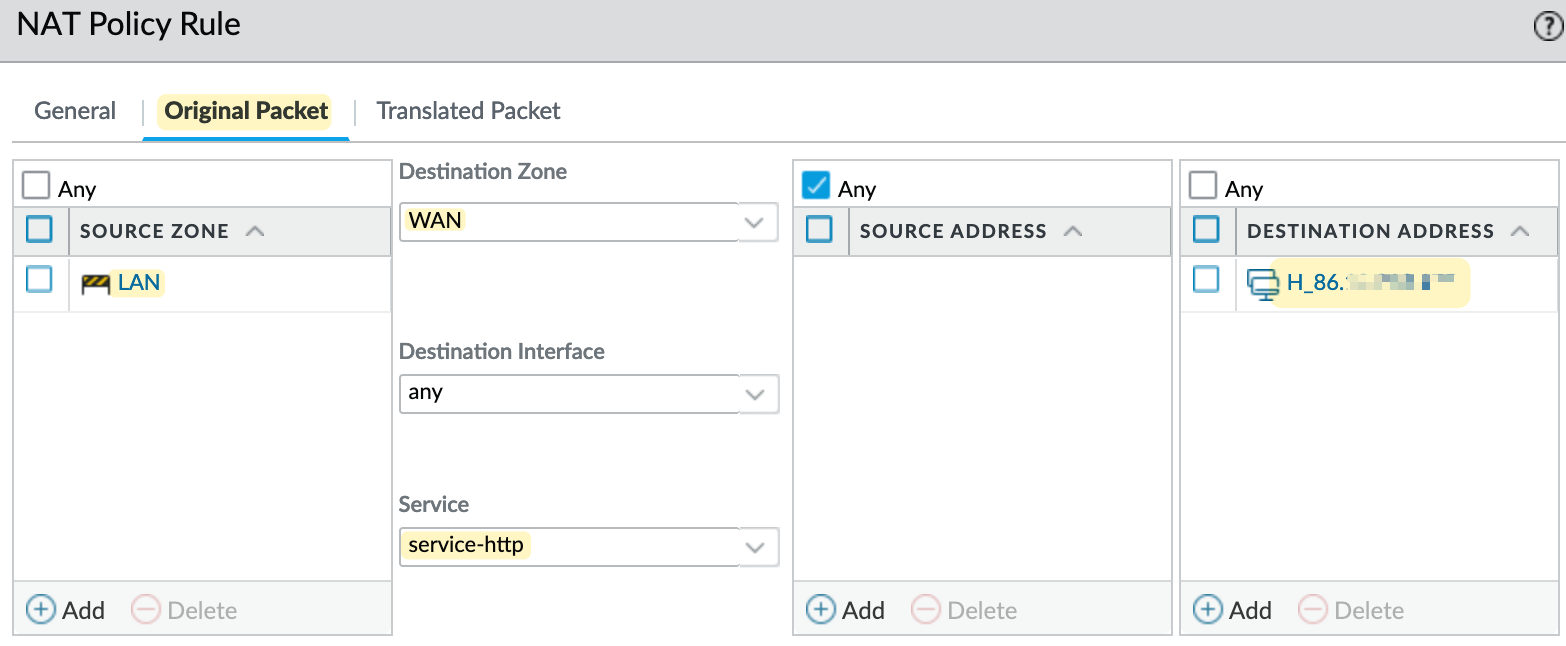
The NAT policy for U-Turn NAT is straightforward. We specify that
-
if the traffic is coming from the ' LAN ' zone and
-
is destined for the ' WAN ' zone, and
-
if the destination IP is the server's public IP and the port is 80
-
then translate the destination IP to the server's real internal IP.
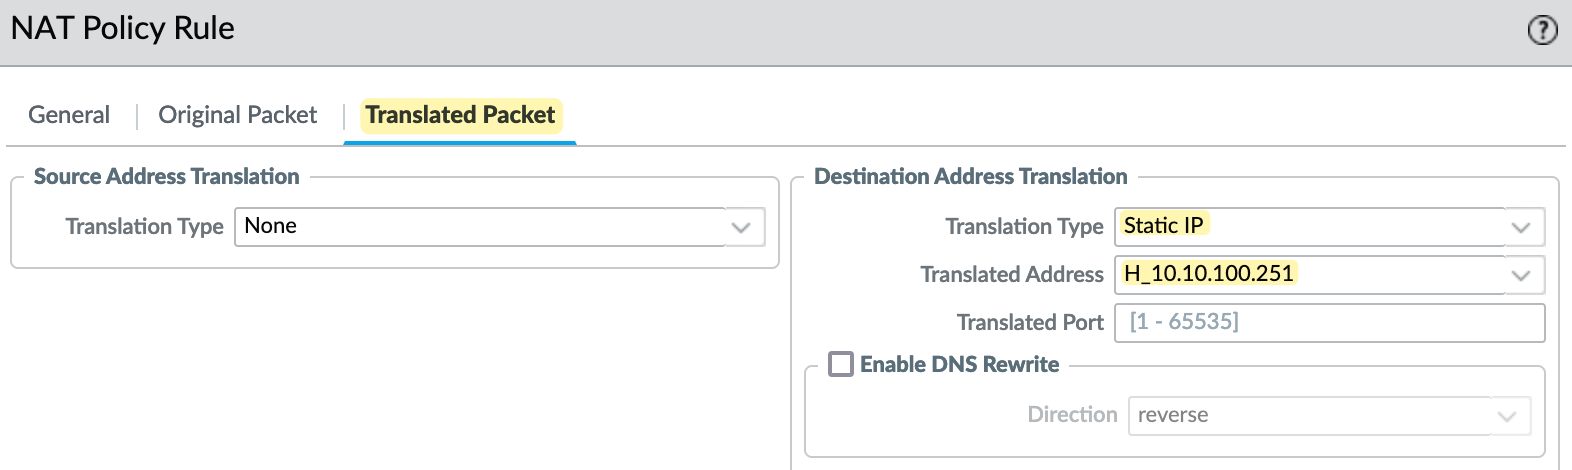

The security policy is similar to the one used for Destination NAT. The source zone is ' LAN ', the destination zone is ' LAB ', and the destination IP is the server's public IP , with the port set to 80.