PAN-OS: Configuring Explicit Web Proxy

Explicit Proxy Overview

An explicit proxy is a specific type of web proxy configuration on PAN-OS firewalls. Unlike transparent proxies, explicit proxies require client devices (e.g., web browsers) to be explicitly configured to send their web traffic directly to the proxy server's IP address and port.

Because the client is aware of the proxy, this method can sometimes simplify troubleshooting specific connection issues. PAN-OS allows leveraging its security features within this explicit proxy deployment model.

This guide focuses on configuring the explicit proxy itself and its authentication methods. Options include:

You can also configure exemptions for specific devices or choose to exclude all traffic from authentication if needed (see separate documentation links in the original text).

General Prerequisites

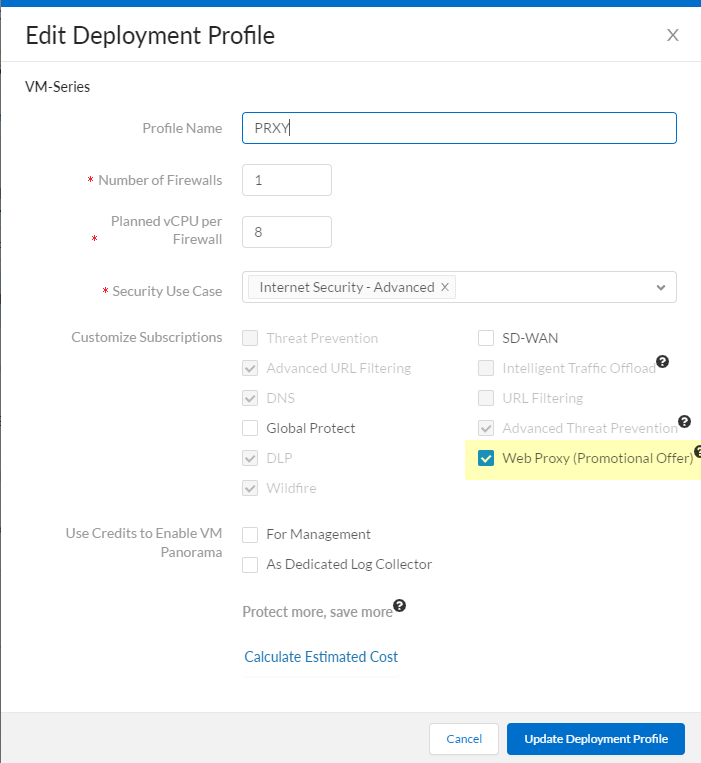
  1. License Activation (Specific Models):

    Web proxy functionality requires license activation on PA-1400 Series, PA-3400 Series, and VM-Series firewalls.

    • VM-Series Example: Log in to CSP, edit the deployment profile, select Web Proxy (Promotional Offer) or the appropriate license, and update.
    • CSP Deployment Profile showing Web Proxy option
    • On the firewall, retrieve license keys ( Device > Licenses ). Restart if needed.
    • PA-1400/PA-3400: Follow standard subscription license activation steps .
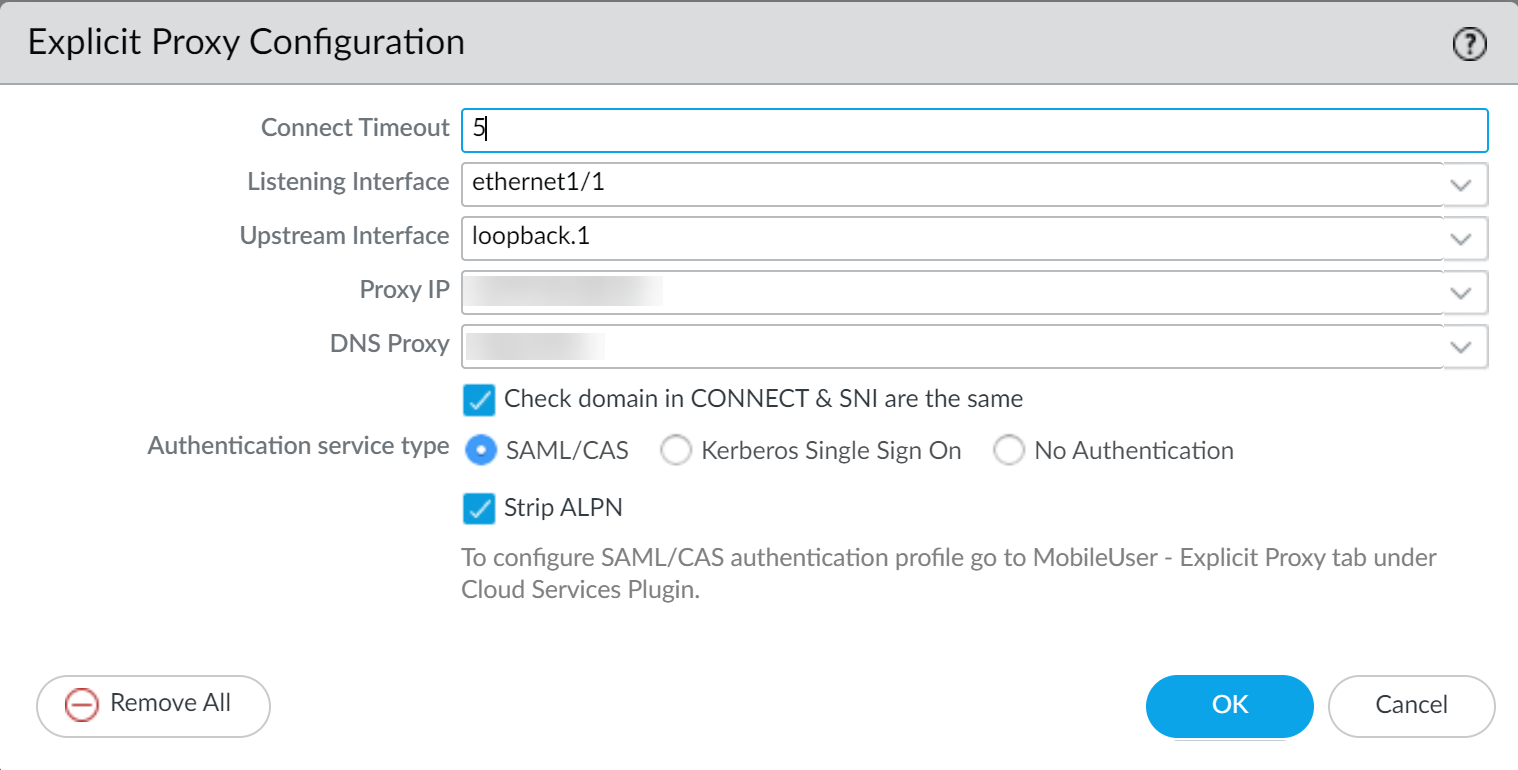
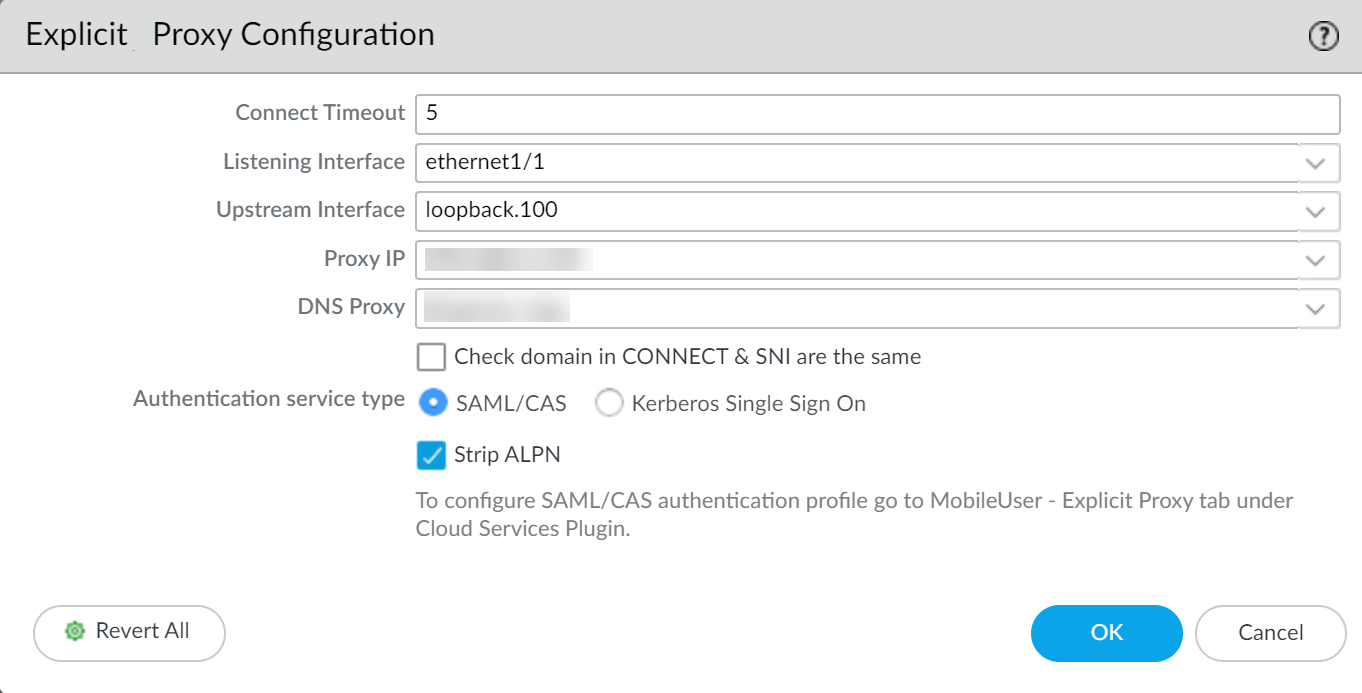
  2. Interfaces and Zones Setup:

    Configure necessary interfaces (Layer 3 recommended) and assign them to distinct zones within the same virtual router.

    • Client Traffic Interface ("Listening Interface"): The interface where the firewall listens for proxy connections from clients. Note its IP address (this is the Proxy IP clients configure).
    • Internet Traffic Interface ("Upstream Interface"): The interface the firewall uses to send proxied traffic out to the internet.
    • Proxy Loopback Interface (Optional but common): Often used as the logical "Upstream Interface" configured in the proxy settings to route traffic internally before it exits via the physical internet interface.
  3. DNS Proxy Setup:

    The explicit proxy often needs to perform DNS lookups.

    • Configure a DNS Proxy Object ( Network > DNS Proxy ).
    • Configure a DNS Server Profile ( Device > Server Profiles > DNS ) with reliable Primary and Secondary DNS servers.
    • Associate the DNS Proxy object with the appropriate interface (often the client-facing listening interface or potentially a loopback, depending on design).

    Reliable DNS resolution for the firewall is required.

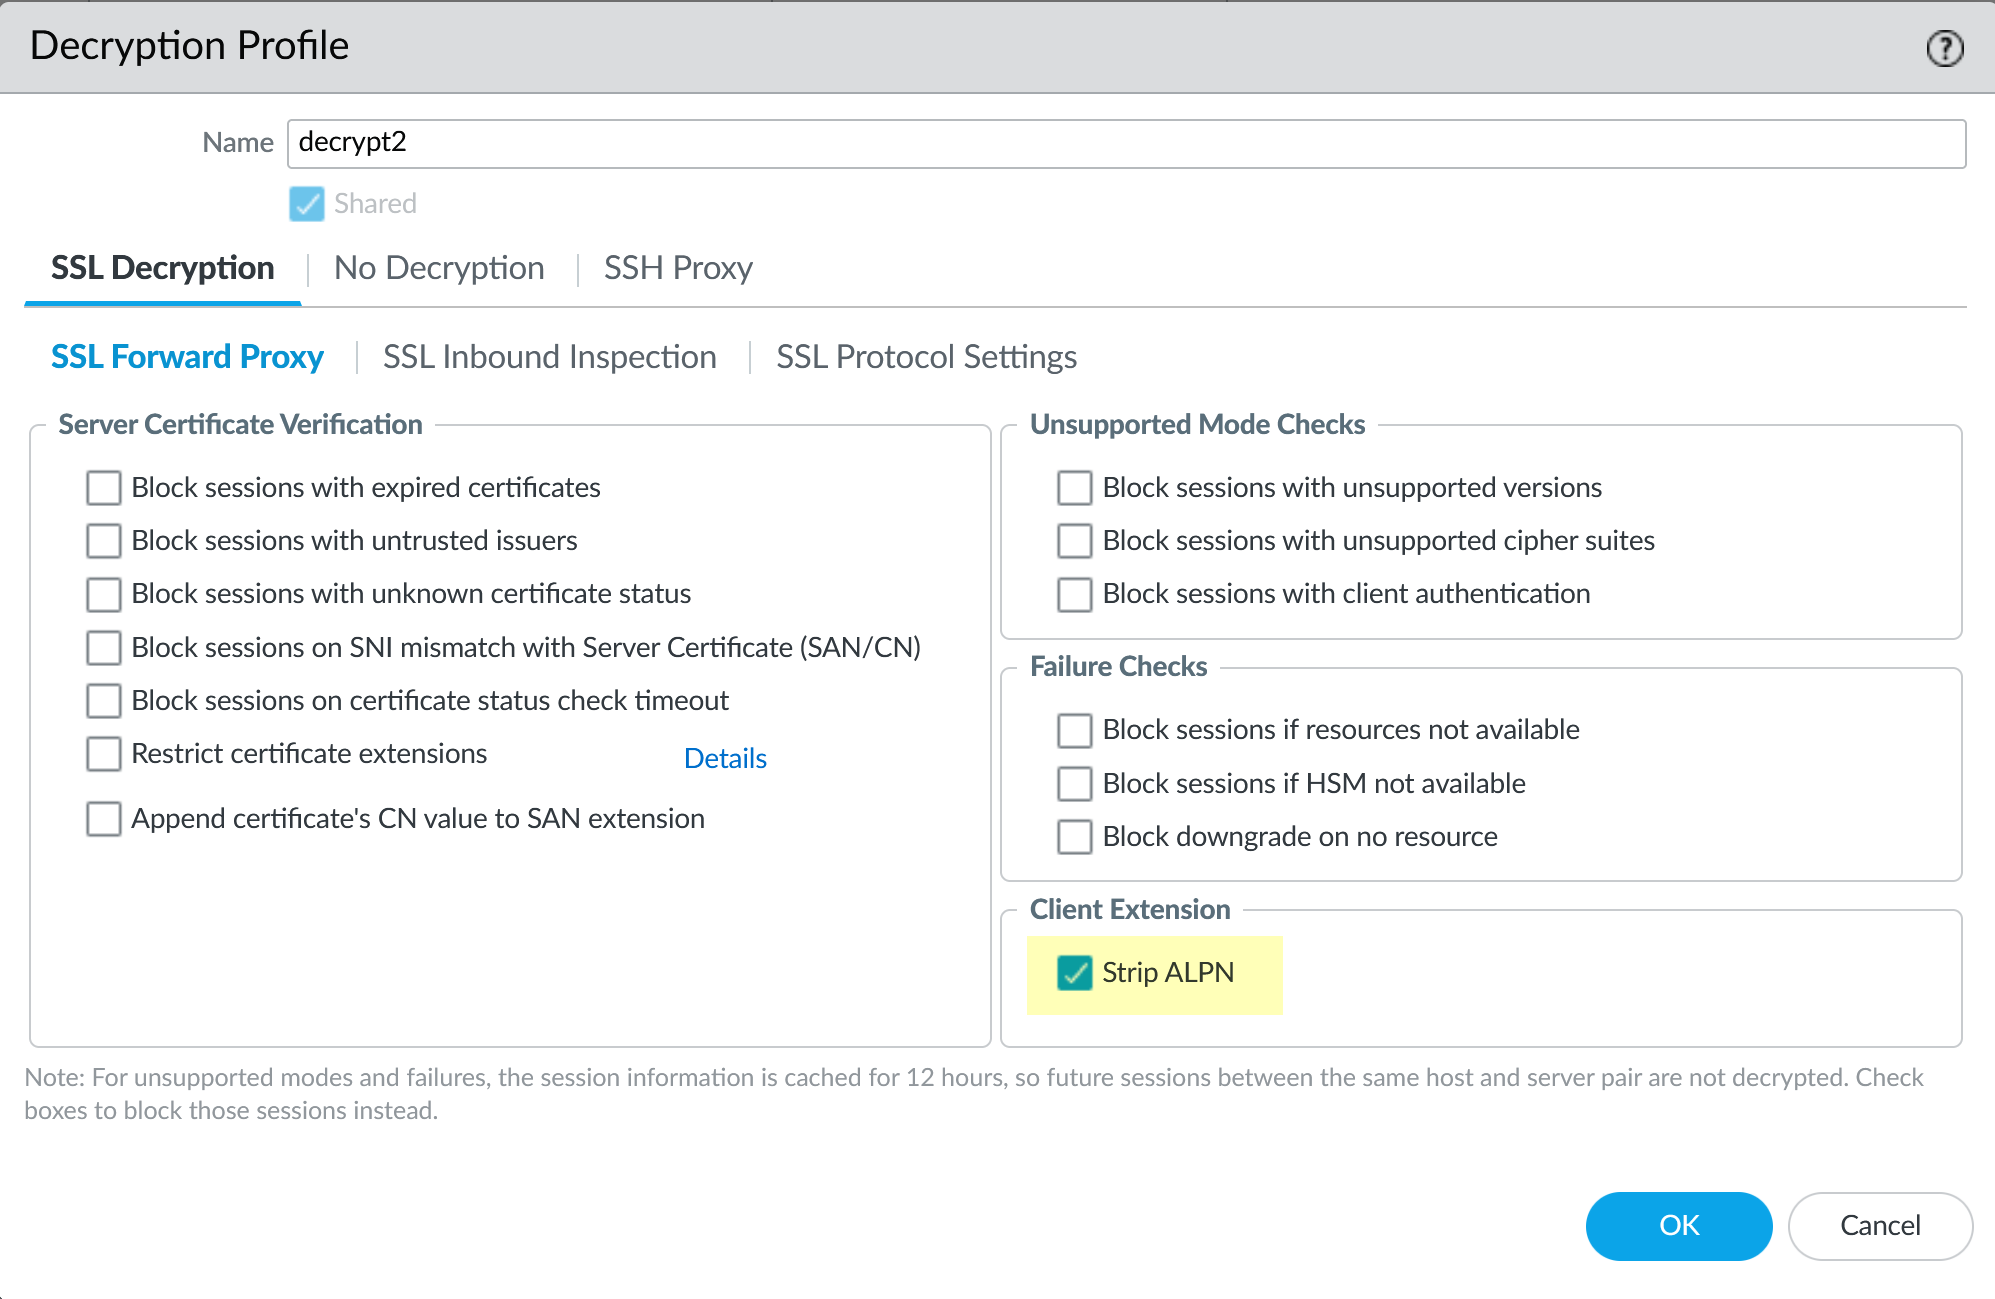
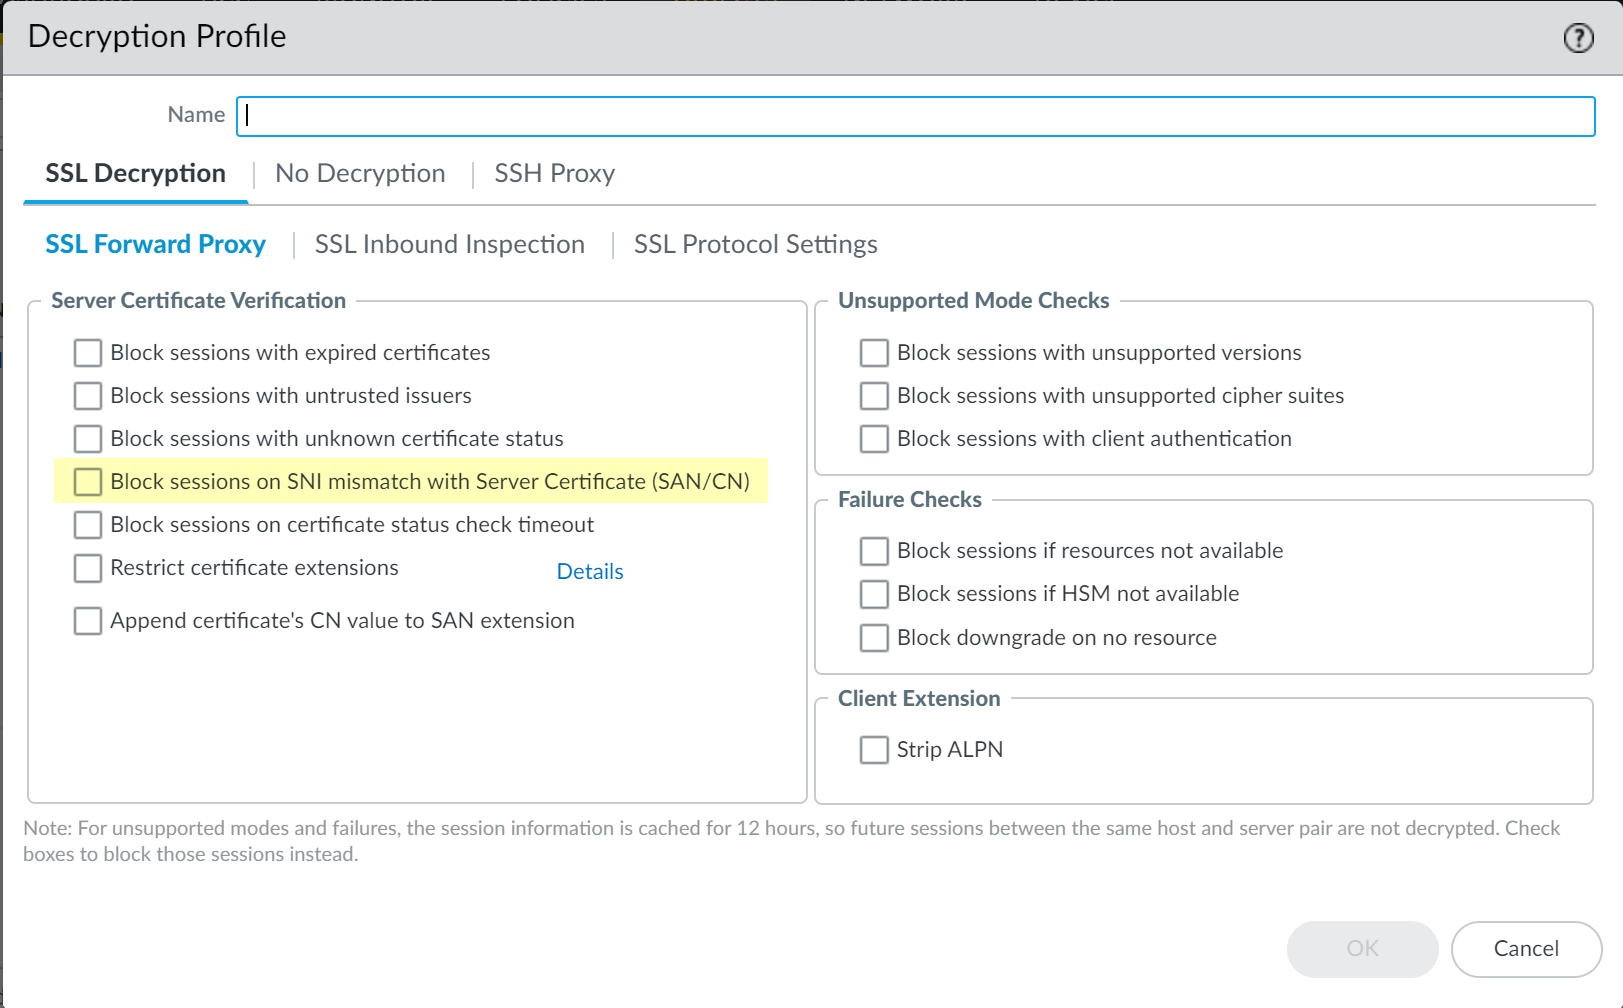
  4. Certificate Setup (for Decryption):

    If you plan to decrypt SSL/TLS traffic passing through the proxy (highly recommended for security), configure SSL Forward Proxy. This involves setting up a Forward Trust CA (self-signed or enterprise subordinate) and deploying its public certificate to clients.

    (See Create a Self-Signed Root CA Certificate or relevant Enterprise CA documentation).

  5. Authentication Method Prerequisites:

    Complete the specific setup steps for your chosen authentication method (Kerberos SPN/keytab, SAML IdP integration, CIE setup) before configuring it in the explicit proxy settings.

Panorama Management Best Practice

If using Panorama to manage the web proxy firewall:

Configure Explicit Proxy Base Settings

  1. Navigate to Network > Proxy .
  2. Click Edit for Proxy Enablement .
  3. Select Explicit Proxy as the Proxy Type . Click OK .
  4. Proxy Enablement settings showing Explicit Proxy selected

    Verify the Web Proxy license is active if this option isn't available on applicable platforms.

  5. Click Edit for Explicit Proxy Configuration .
  6. Explicit Proxy Configuration dialog box
  7. Specify the Connect Timeout (seconds).
  8. Select the Listening Interface (the interface clients connect to).
  9. Select the Upstream Interface (interface proxy uses to send traffic onward, often a loopback).
  10. Enter the IP address of the Listening Interface as the Proxy IP address.
  11. Select the DNS Proxy object created earlier.
  12. (Optional) Check Check domain in CONNECT & SNI are the same to help prevent domain fronting attacks.
  13. Select the desired Authentication service type :
    • Kerberos Single Sign On
    • SAML/CAS (Used for both SAML and Cloud Identity Engine)
  14. If Kerberos was selected:
    • Select the Kerberos Authentication Profile containing the keytab.
    • Explicit Proxy Config showing Kerberos Authentication Profile selected
  15. If SAML/CAS was selected:
    • Select the SAML or CIE Authentication Profile .
    • Explicit Proxy Config showing SAML/CAS Authentication Profile selected
  16. (Optional) Check Strip ALPN if using HTTPS and decryption.
  17. Explicit Proxy Config showing Strip ALPN checkbox
  18. Click OK .

Auto-Generated Rules & Objects (for SAML/CIE)

When configuring SAML or Cloud Identity Engine authentication, the firewall/Panorama automatically creates supporting rules and objects:

These are automatically generated and generally do not require manual modification. They allow necessary DNS lookups and communication with Palo Alto Networks cloud services for the authentication process.

Configure Authentication Methods (Details)

Refer to specific documentation for detailed steps on setting up the chosen authentication method:

Configure Supporting Policies

After setting up the proxy and authentication method, configure necessary policies:

  1. Authentication Policy: ( Policies > Authentication ) Create rule(s) matching traffic destined for the proxy (based on ingress zone, potentially source/destination if needed) and set the Authentication Enforcement action to use the Authentication Profile configured for the proxy (Kerberos, SAML, or CIE). Place exemption rules above enforcement rules.
  2. Security Policy: Create rules to allow traffic:
    • From the client zone to the proxy listening interface/zone.
    • From the proxy upstream interface/zone to the internet (Untrust zone). Apply relevant Security Profiles (URL Filtering, Threat Prevention, etc.) to this rule for inspection.
    • Allow DNS traffic from the client zone (if using DNS Proxy on client interface) and/or proxy zone to DNS servers.
  3. NAT Policy: Configure Source NAT (SNAT) if needed for traffic originating from the proxy upstream interface/zone going to the internet.
  4. Decryption Policy: (Optional but recommended) Configure SSL Forward Proxy Decryption policies to inspect HTTPS traffic passing through the proxy.
    • (Optional Best Practice) Select Block sessions on SNI mismatch with Server Certificate (SAN/CN) in the Decryption Profile used for proxy traffic.
    • Decryption Profile option Block SNI Mismatch

Final Commit

Commit all configuration changes to activate the explicit proxy setup.

Take the Quiz

Explicit proxy quiz