Wildcard Support for Split Tunnel Settings Based on the Application
Prerequisites
- GlobalProtect app version 6.3.1+
- Windows and macOS endpoints
- GlobalProtect Subscription License or Prisma Access
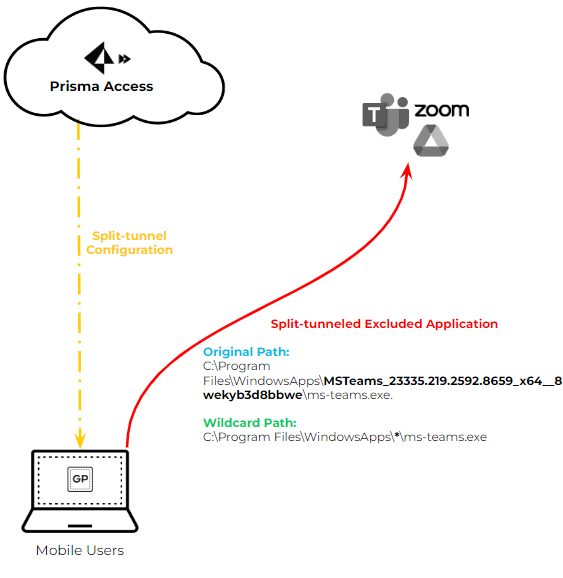
Starting with GP App 6.3.1, a single wildcard character (*) can be used within the application path for application-based split tunneling (include or exclude).
This is useful for applications whose paths change frequently due to updates (e.g., version numbers in the path), like Microsoft Teams or Symantec WSS.
PCNSE: Understand the use case for wildcards in application paths (handling version changes).Example:
- Old Path (might change): C:\Program Files\WindowsApps\MSTeams_23335.219.2592.8659_x64__8wekyb3d8bbwe\ms-teams.exe
- New Path with Wildcard: C:\Program Files\WindowsApps\*\ms-teams.exe
Configuration:
- Follow steps for Application-Based split tunnel.
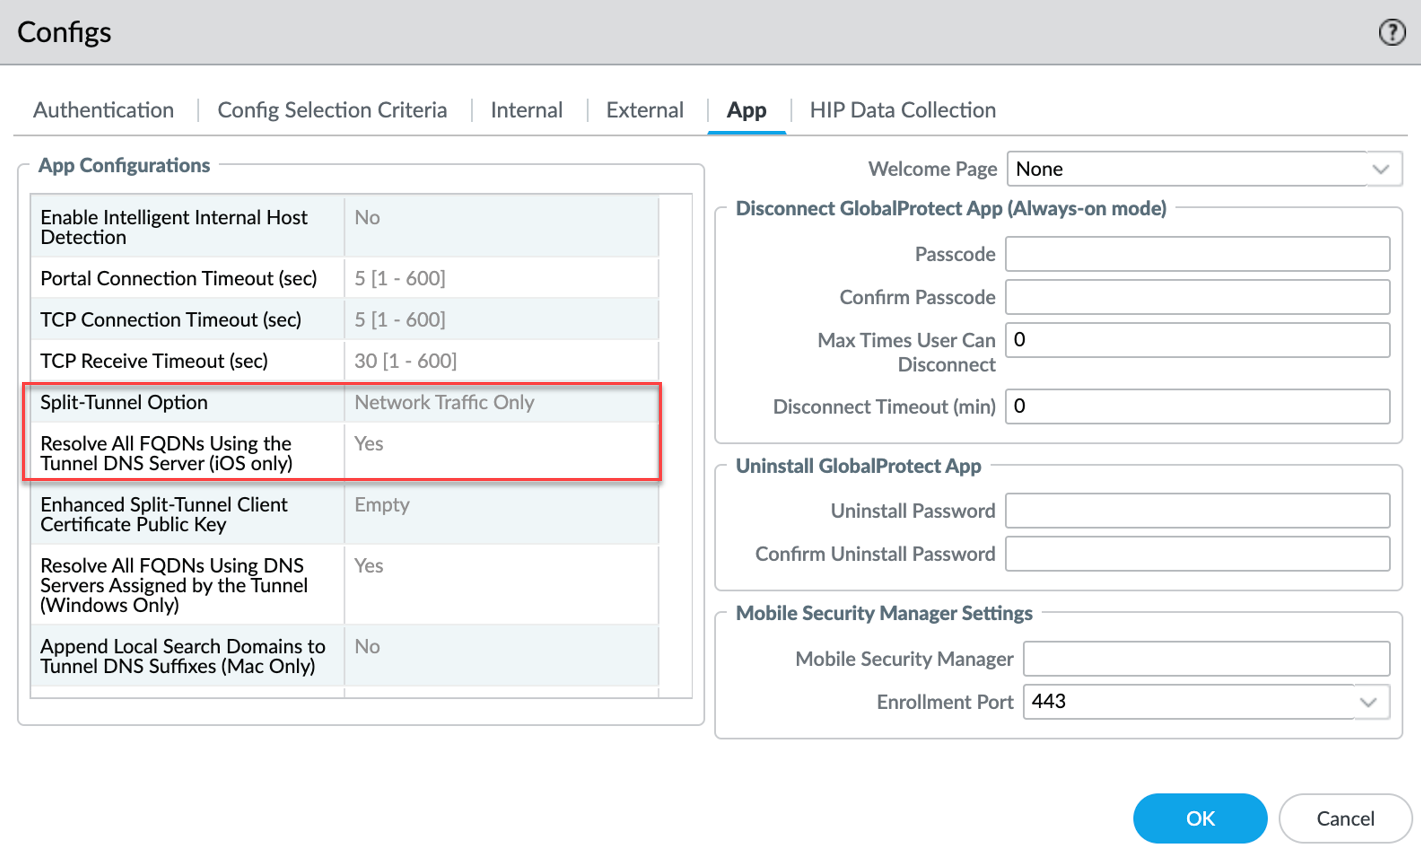
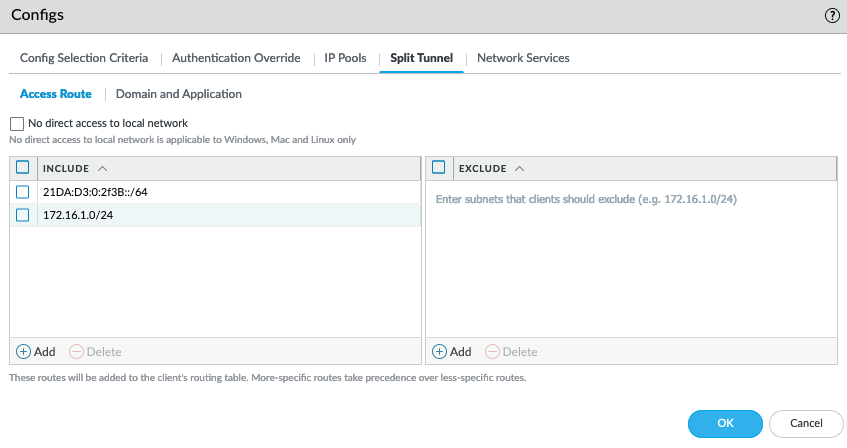
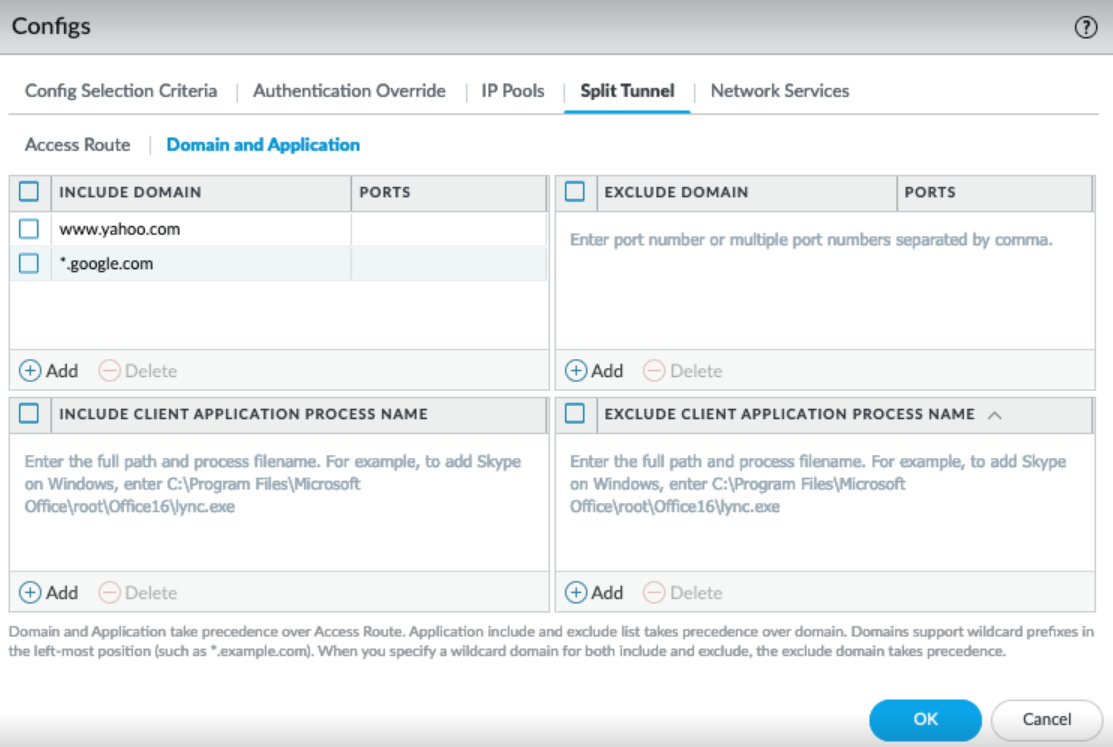
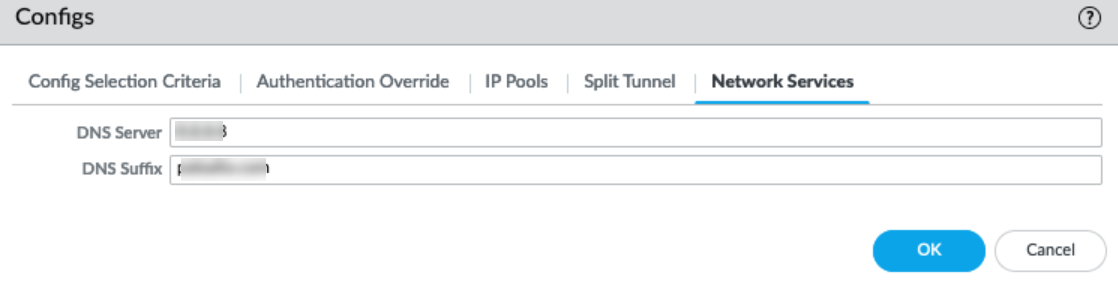
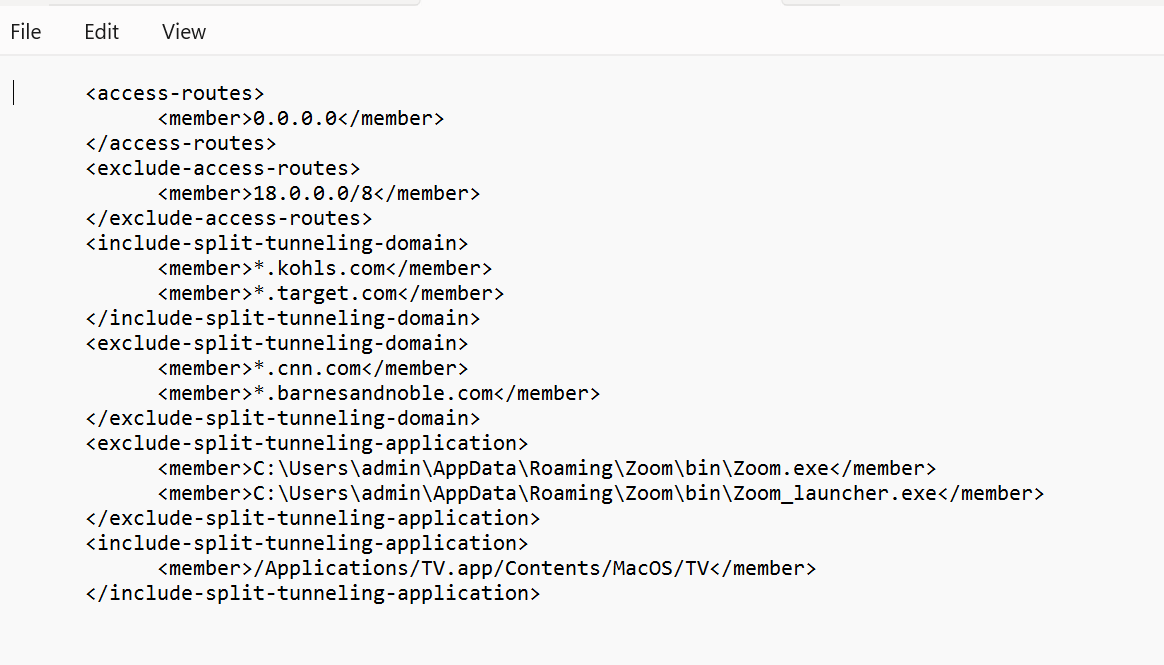
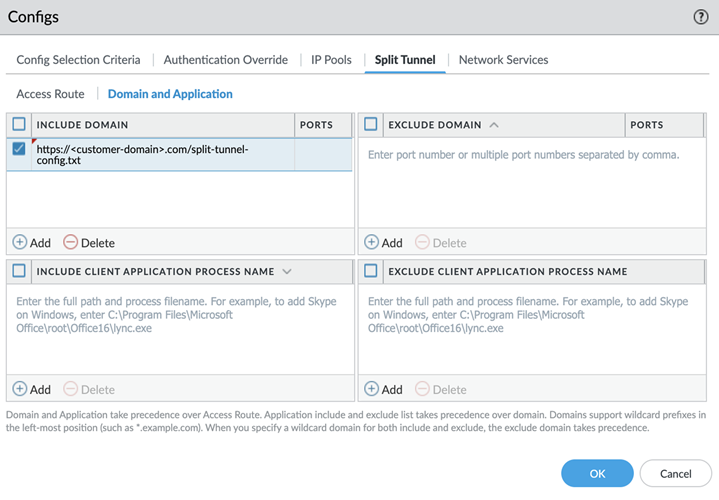
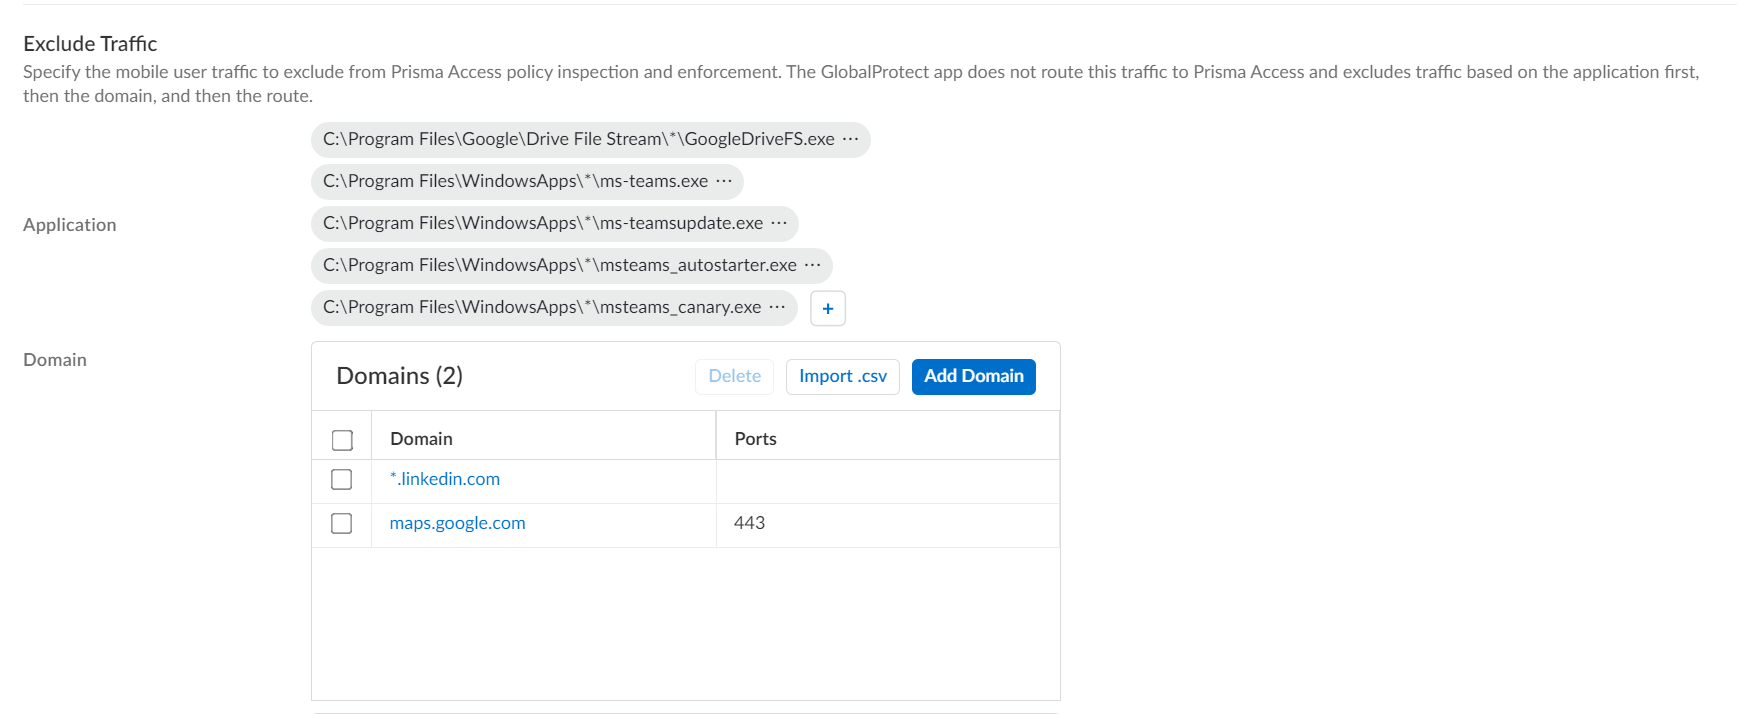
- When adding an Include or Exclude application path ( Network > GlobalProtect > Gateways > ... > Agent > Client Settings > Split Tunnel > Domain and Application ), insert a single '*' where the path segment varies.
Windows Example:
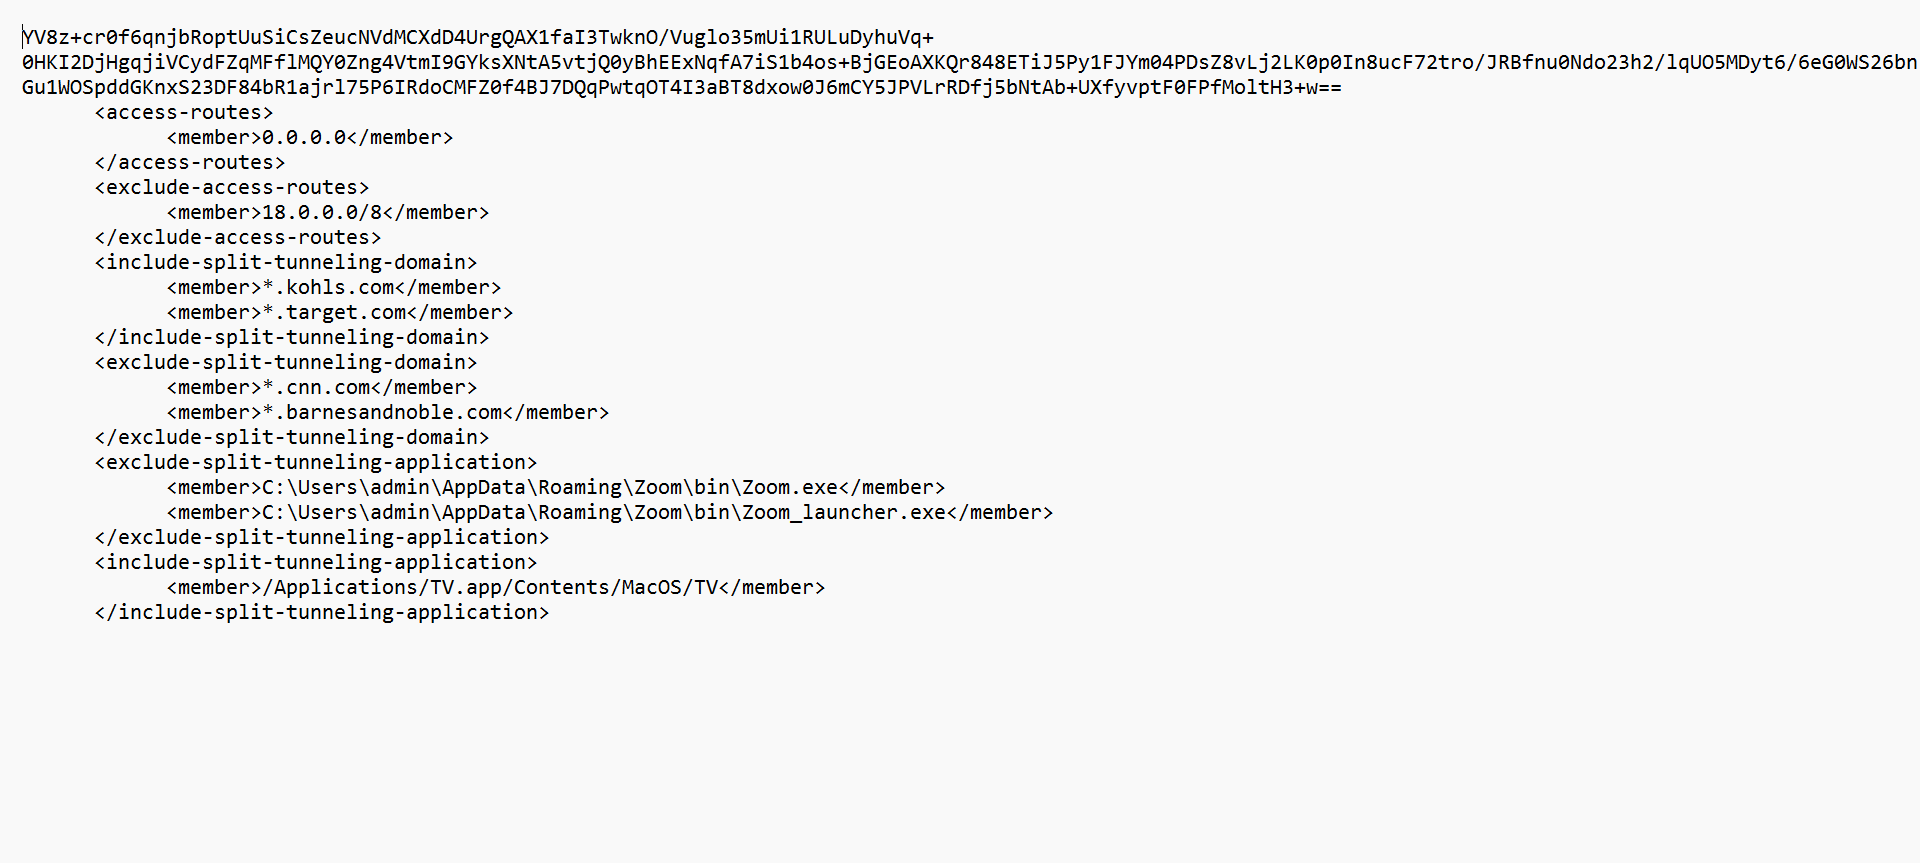
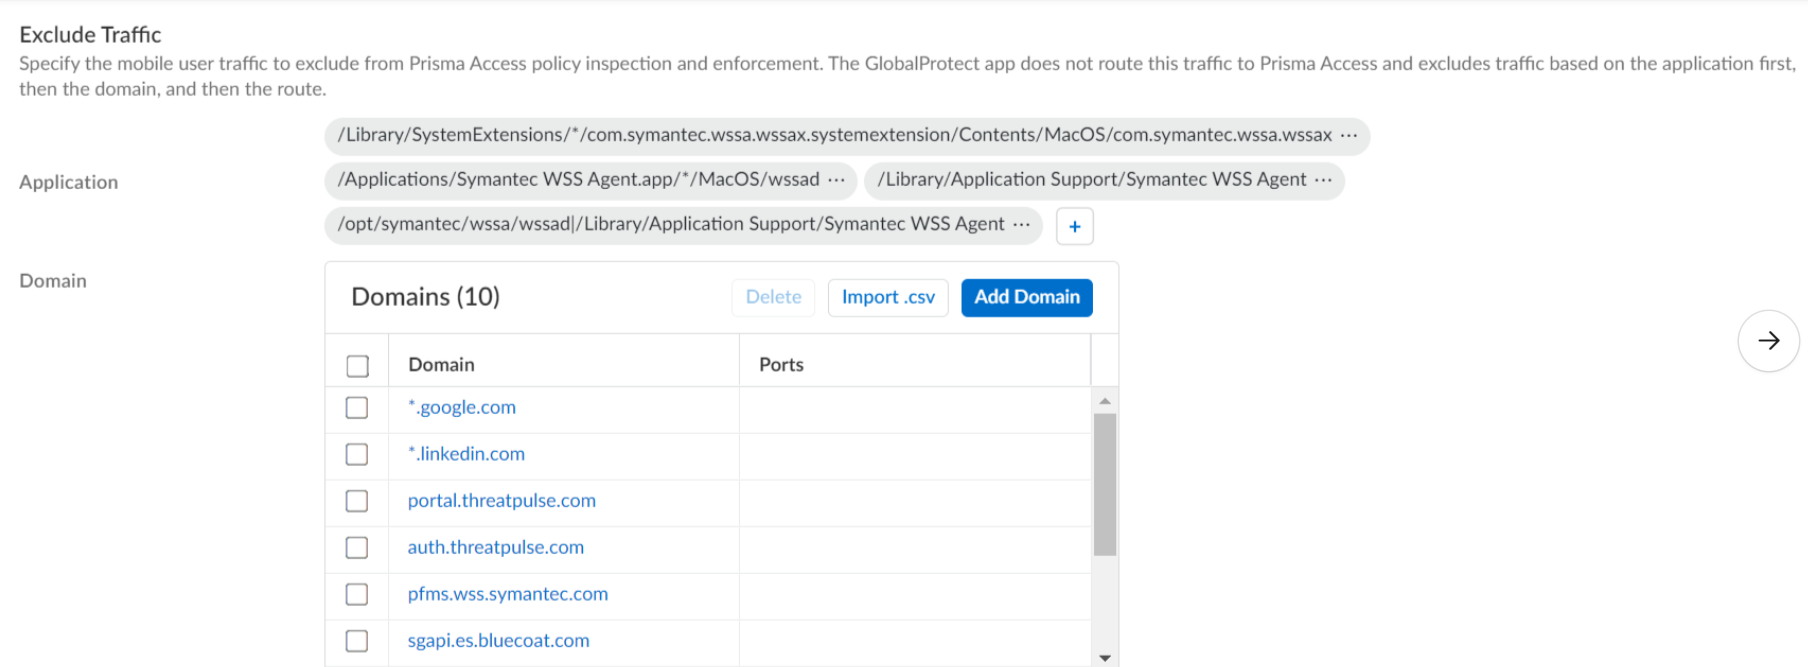
macOS Example:
Limitations:
- Only one wildcard (*) is supported per path. (e.g., C:\Users\*\AppData\*\Zoom.exe is NOT supported).
- The path must end with the application executable name , not a folder name containing '*'. (e.g., C:\Path\*\app.exe is OK, C:\Path\* is NOT OK).