How to Generate a New Self-Signed SSL Certificate
Symptom
-
If you do not want to load your own certificate into the device or use the default self-signed certificate, a new self-signed certificate can be generated through the web interface or CLI. A CSR can also be prepared.
-
This new self-signed certificate can be used for SSL Decryption or for a GlobalProtect portal or Gateway Certificates.
Environment
-
PAN-OS 7.1 and above.
-
Palo Alto Firewall.
-
Self Signed Certificate generation.
Resolution
Steps
-
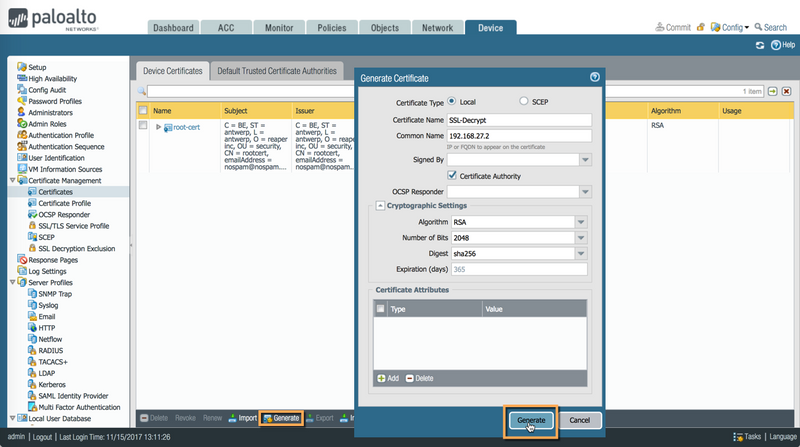
From the WebGUI, navigate to Device > Certificates.
-
Click Generate at the bottom of the screen.
-
Enter the desired details for the certificate. The details entered here are what users see if they view the CA certificate for an encrypted session using the browser.
Note: If you would like the certificate to be valid for longer than 365 days (1 year), then please change the "Expiration (days) from 365 to a larger value before creating the certificate.
-
On the Generate Certificate window, click Generate:
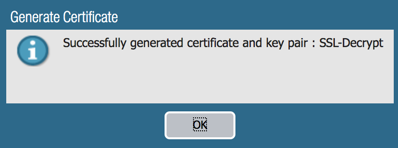
Certificate successfully generated
-
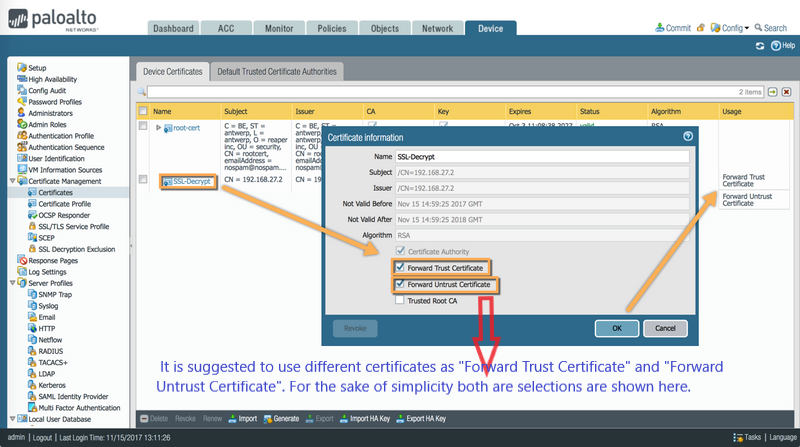
To verify that the certificate was created properly, click on the newly generated certificate.
Note:
If using this certificate for SSL Decryption, then the options "Forward Trust Certificate" and "Forward Untrust Certificate" are used. It is important to use different certificates as "Forward Trust Certificate" and "Forward Untrust Certificate". The reason for this is that otherwise, hosts will always be presented with a certificate they trust, even when the server presented the firewall with an invalid certificate. For the sake of simplicity both selections are shown below.
To delete or remove the certificate, uncheck both options, otherwise, an error is generated.
-
Commit the changes. When the commit operation completes, the Self-Signed CA certificate is installed.